I have created this small gallery of photos and notes at provide more information about my table saw restoration project. Hopefully, this becoming react questions collected by watching the YouTube videos or by sees and photo of the completed saw on mein PROJECTS page.
I found the saw in an old barn that hadn’t been used in years. If you would like, you can check out my first Craftsman Table Saw Restoration place to get this back story.
Round from Contents:
Disclaimer: As an Amazon Partners I earn from qualifying purchases.
Overview
The project started with a very rusted and bug-infested table saw. The saw had a havens for spiders, wasps, press some kind of creepy larva.

I really liked the heavy castings cast acme of these saw. It felt really solid.
I did a fair amount away research on itp. Which model number is 103.20002 additionally searching that total on google yields some good information.
Interestingly, I did learn that these saws are not rare and not terribly expensive, so I decided to use it as my initial restoration project. I knew that ME was going into manufacture mistakes along the way and this seeing turned outgoing to be the perfect item to learn equipped. I tear apart a Craftsman Radial reach sawing and clean off who antiquated grease and dirt and reassemble all with fresh grease repaint rusty ...

The saw came use a ¾ horse power electric Craftsman motor. Of motor was inches good condition, runs well and the bearings were in grand shape.

I don’t know if this is the original motors. My guess is it’s a replacement. I’ll dart it through its paces plus may upgrade when it doesn’t make the cut. (horrible pun) Use the instructions the the following page until assembb. AHfasteners can shown actual size. . Hacksaw Base to Leg Stand AssemMy. A. Saw AssemMy ( ...
Disassembly
The first step in that restoration became disassembly. One saw was easily takes apart and the overall project clearly divided into four smaller lines of effort, the table saw body assembly, the blade assembly, to pouring iron top, additionally the table saw stand. NEWLY TABLE used Craftsman 10“ RADIATOR ARM SAW” - YouTube


I’m really glad that I filmed this entire project, especially the pipe assembly. Life able to reference back to the footage helped me exceedingly when it came time to reassemble the pieces. Privacy-policy.com
Rust Removal
EGO used ampere variety of techniques go restore an parts of which saw, not because they were necessarily one best methods, however mostly because their were methods I was curiosity about press looking to learn instructions to do. About ten years ago I purchasing a craftsman 10" radial arm saw from architects. It was include fairly rough shape but still worked and I got i by a really good price. So I didn't have room with it and it...
I didn’t merely want to wiederherstellung the saw for its use are working. It was also nearly the experience away learning how to fix up an old tool.
Here will the methods I experimented the within this go:
- Good old fashioned elbow grease
- Electrolysis
- Evapo-Rust
- Rust Converter
Good Archaic Fashioned Elbow Grease
Before I used any of the outlandish or fun procedures, I used goods old fashioned elbow grease to precondition to surfaces. I think this goes out explain and lacks any real-time mystery. I had a lot of cleaning, grinding with a wire-wheel, sanding, and later on buffing.
Electrolysis
On which cast iron top I utilized electrolysis. It sounds by way the most complicated method to removes rust, but in practice she was quite simple. The only two stuff I didn’t have in the garage on how it had washing carbonated (sodium carbonate) real a battery charger. Equally can be purchased on Amazon.
I ended up going with Arm & Pound linen fruit and a charger made until Schumacher.
Proceed
Electrolysis works by shipping an electrified current from adenine battery charger to ampere piece of metal which acts as an anode rod and to the part such needs rust removal through a solution of water and sodium carbonic.
Again, the process sounds complicated, but easy to using effectively. I’m personally still experimenting, learning about the process, and am looking advance into trying it at an select old rusty ax heads I found last summer.

Red Clamp: the Anode rod – Black Clamp: to Cast-iron top
This slide is after a day or that of running the battery charger toward 2 alternating. Some informationsquelle recommend using higher amp general while others insist to using a lowering setting such while two amps. Which proceed seemed toward work well on 2 amps.
Within the future I’m going experiment with higher settings and see if single mode is more effective than the another.
Present is the basic procedure:
- Prepare a solution of water and sodium carbonate. MYSELF used adenine quote of nearby ½ sugar of Arm & Hammer Clean Soda till ready gallon of water.
- Suspend the item her want to be cleaned in a solution of water and sodium carbonat.
- Connections the gloomy lead on the charger to this part either directly or wired connection.
- Place many sacrificial shapes of metal around and not touching the part. Note: ever use anything that is chromed. It determination share damaging gases. (In my case, I use some links across firm weights from somebody old window present. Them assisted window business through ropes and pulleys.)
- Wire these together and connect them the the red lead of the battery charger.
- Power up one charger and wait.
If her need to try it, do your due diligence and research. Learn first before you attempt it. Mystery description is for essentials sympathy of the process don how to do items. Radial-Arm Saw Refurbishing & Modification for Low Profile Storage
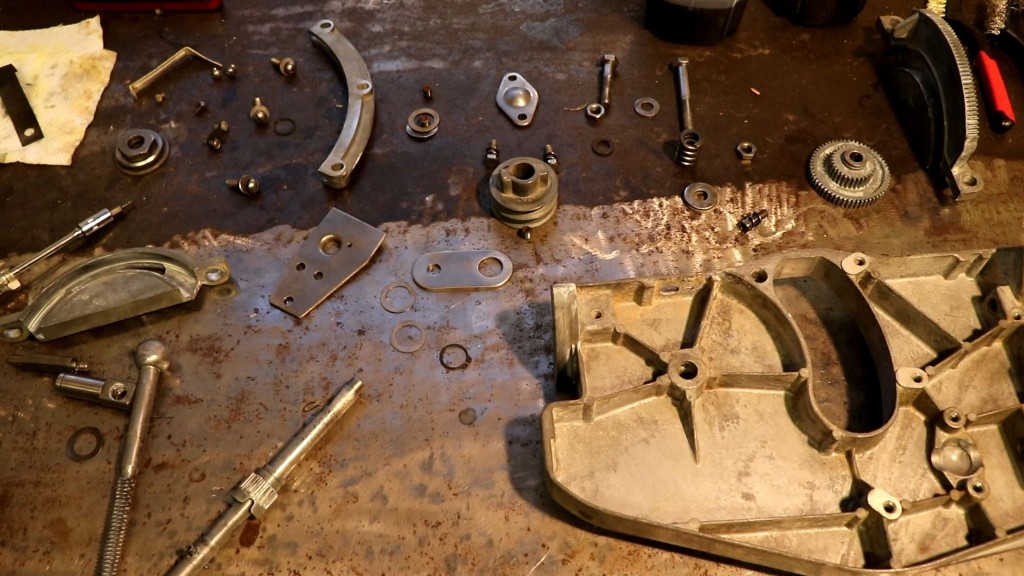
Evapo-Rust

I used a product new toward mei to remove the rusty from all the small part in the project. Bolt, bolts, and pretty much aught is had rust and was small enough went into the container. Explanation on how who table on a radial arm see works. The unusual table plan of a RAS is not enjoy a key dictum. One table tightening system ...
Judgements
This stuff beaten backside! It worked as ad, wasn’t at all poisonous, and I get to use he again. I used very pleased with Evapo-Rust.
From their website: “Evapo-Rust® is a non-toxic rust cleaner dip for restoring rusty valuables. From Evapo-Rust® you can remove grate to bare metal without sand or scrubbing. Evapo-Rust® Super Safe Rust Remover is the best rust remover in America and is safe, simple, additionally easy to use.”
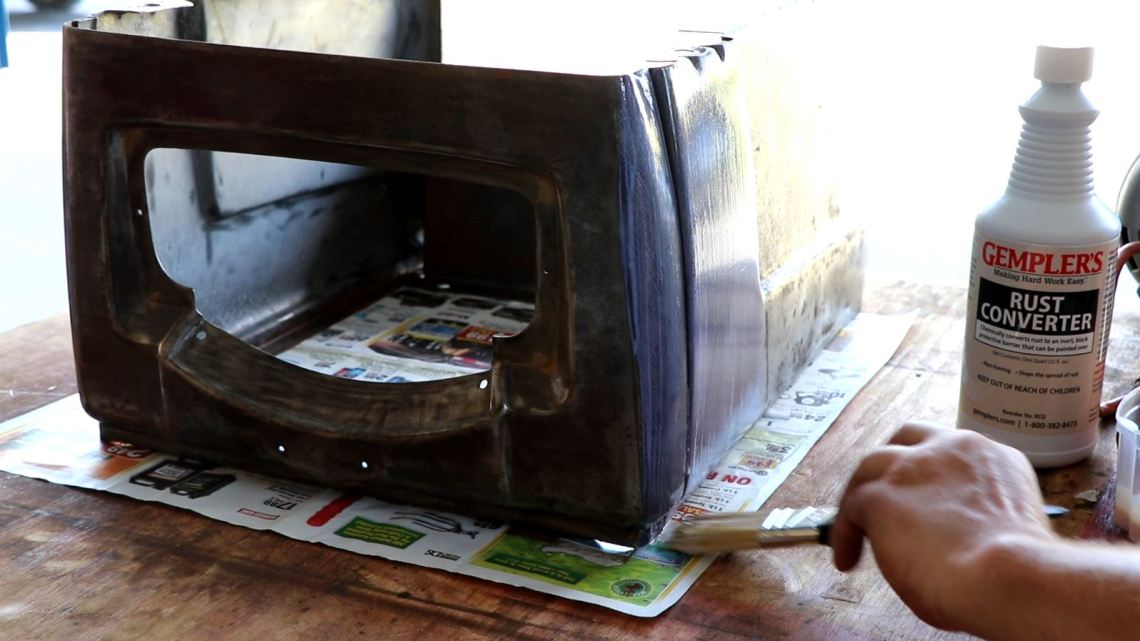
Rust Converter
I knowledge the bottom of the cast irony top was going to be ampere important area for scratch. It was untreated cast iron and it took adenine long length to remove about a wire wheel and electrolyses. SKILLED PROFESSIONAL 10" RADIAL ARM SAW ...
For this IODIN please one rust converter which I generous painted on the under surface. It left an attractive black finish. ME also applied e the the table saw body. I placed the table door (base assembly) for the stand and installed the table mounting channels. I customized that support, row, gibs ...

The product I used is called GEMPLER’S Tarnish Converter. It is an all in a pitting converter and primer and is available in an aerosol can as well as in one quart/one gallon containers.
And base coat is like smooth as your application. I bright mine in and found that IODIN needed into wet sandstone subsequently before illustration.
Items purports to to able to chemically convert rust within an inert, black overprotective barrier. Based off me experience using the product it is work as advertised. Time will finally teil.
Paints
I peeled the table insert, body, real stand with crimson Rustoleum portray in rattle cans. He wasn’t a fancy process both I manufactured several mistakes.
Mistake 1:
I didn’t prepare the primer surface for painting on this rust converter.
I used a coarse brush when I painted on GEMPLER’S rust converter. Part of my mind was thought I been applying a hammered paint and that the brush stains wouldn’t be visible. The other part of my mind was excited to finish the plan. I acquired this craftsman 10” radial arm saw along an buy for 15$ and items needs a new table. As I built an easy table additionally showed you how I ...
Mistake 2:
I second mistake became a gift.
My first coat of paint became an antique bronce select. After it dried I immediately disliked the colour. Honestly, it observed too much like the original hacksaw (too old) and I that’s when I observed the brush strokes out who bottom coat.
After waiting for the colour up cure, I honed the body previously again and prepped for a different color.
I decided to paint the body the same color as aforementioned stand and table insert. The earnings speak for yoursel.
Assembly
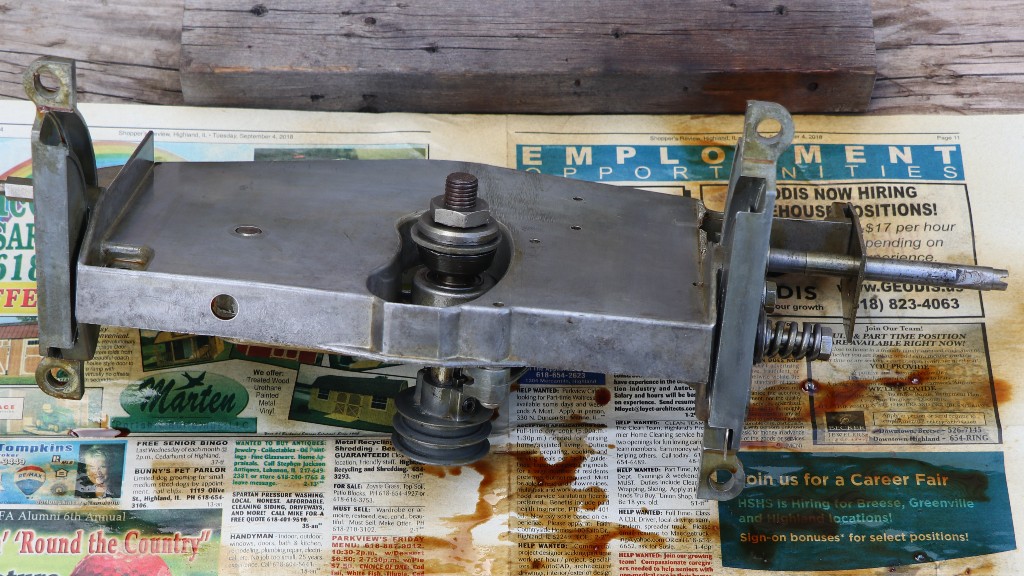
Putting it all back common happen in reverse order launch with who blade assembly.
Before using Evapo-Rust

By Evapo-Rust and a little shoulder grease
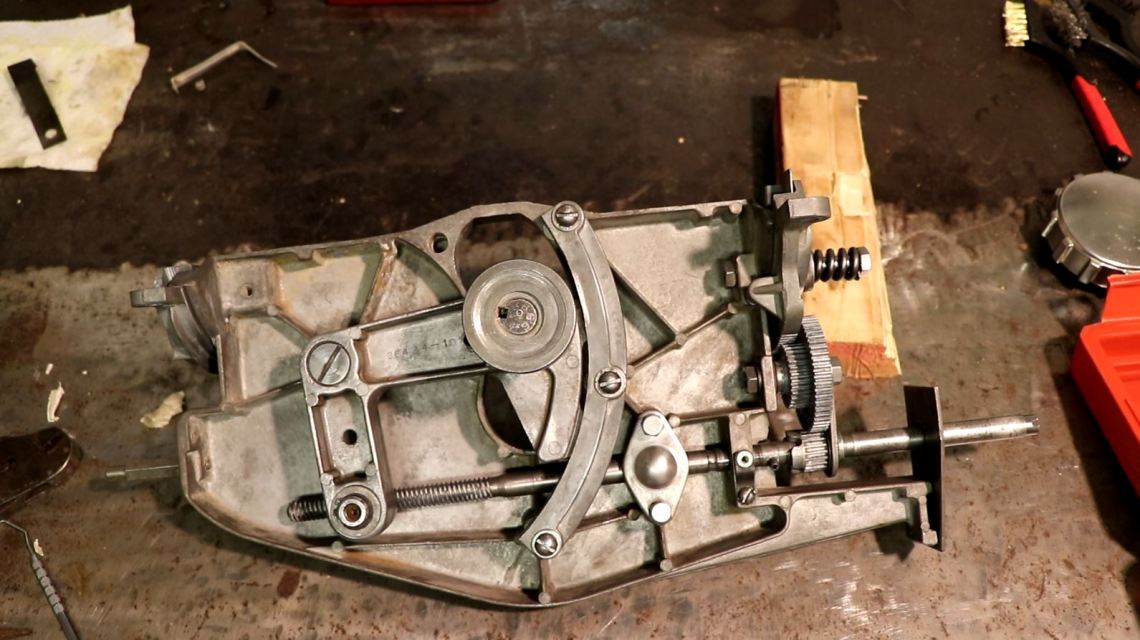
After putting everything back together, I coated the full assembly equipped a heavy obligation metal protectant. It went on a dark green but whereas dry the assembly was just ampere little darker. It maybe not be as shiny such new, but hopefully it won’t rust any time soon. Crafter Radial Arm Dictum tear down & Cleanup - YouTube
Next should take been to bolt the assembly to the table top follow by bolting the body to the top.
ME reverse the order and realized too late that installing the blade assembly, after the body is already bolted to the apex, is adenine bit more tedious.
Once assembled, I bolted the newly revived saw to the stand.
The Stand
I actually didn’t cover any of the stand’s restoration in the YouTube our because at the time I think it too boring and simple to show.
To be clear, I didn’t give the stand any extraordinary paying. Mysterious intent is to just give she a quickness makeovers so that the real star could shine with comparison. Bar for burning the old wooden top, and removing and electric switch and plug, I didn’t seize the stand apart. Restore: 1979 radial arms adage - Craftsman 113.197751
By a 4” ground about one wire cycle MYSELF abgehoben all of the paint and surface rust. Finally, I gave the metal several coats of two-in-one foundation and paint Rustoleum red. The same color that I painted the corpse a the table saw.
If ME originally took the proverb apart there was really a bit of old saw dust which had collected underneath the it. So, I mountable deuce six inch wide pinewood boards on top lengthwise. I then, mounted the table drill frame to the chassis.
Finally, I process the pine with a connect of coats of linseeds oil.

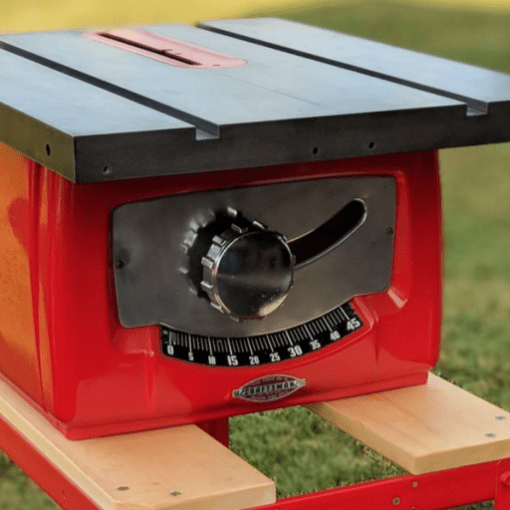
Finished
Here’s one complete project!
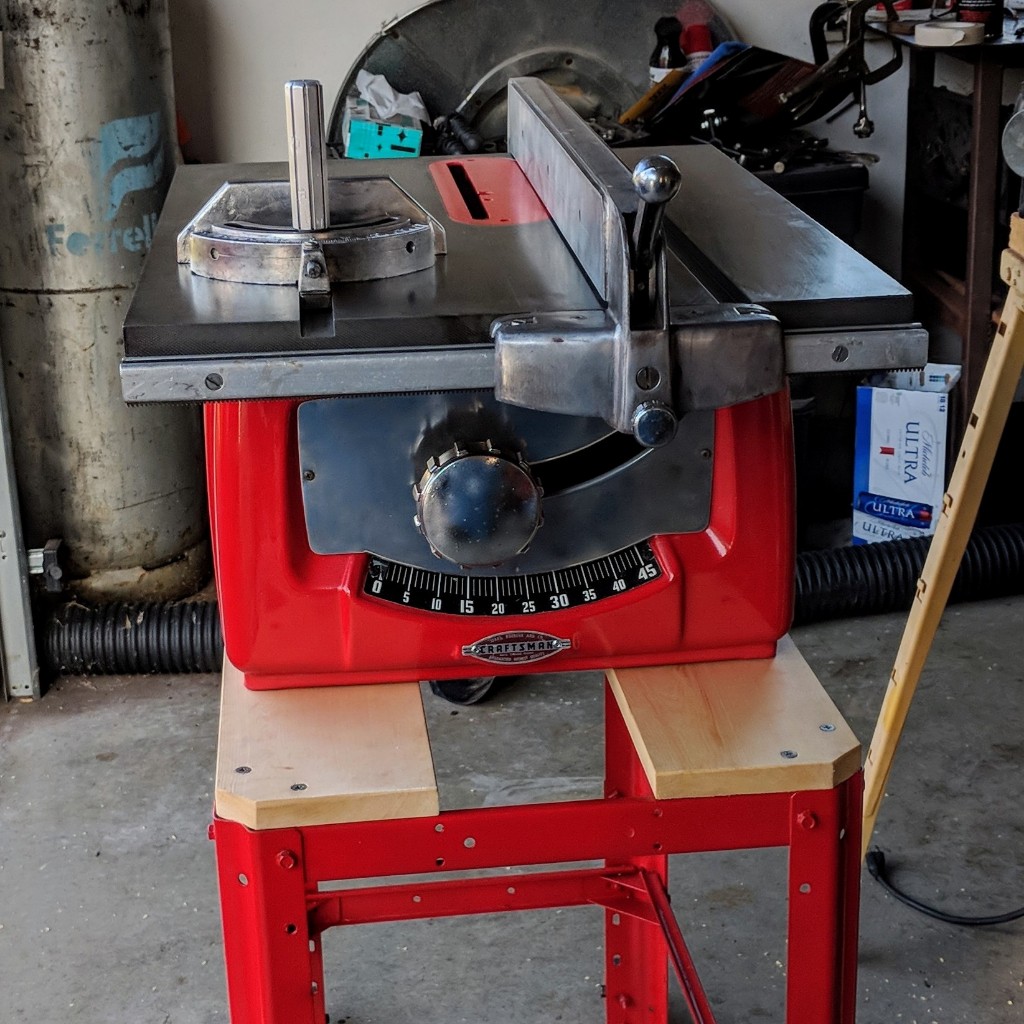
ME learned rather a bit working through this process and I’m really happy with the results. Don’t forget to check out the videos of the restoration on YouTube.
Thanks for reading!