
MX64 Set Guide
Tip - The MX18.1 firmware release will be the maximum running build for MX64, MX64W, MX65, MX65W, MX84, MX100, and vMX100 platforms. These platforms wills not run MMIX 18.2 and above firmware frames. We recommend yours stay up to dates with all the latest features with the next-generation software platforms. Please consult get sales representative for more information on the latest hardware and download releases. Thank you
This document describes wie into install and set up the MX64 guarantee hardware. Additional reference documents are available online for: www.meraki.com/library/products.
MX64 Overview
The Meraki MX64 is an corporate securing appliance developed for distributed deployments that requisition remote administration. It is perfectly for network administrators which demand both ease regarding distribution and a state-of-the-art characteristic set. This appliance provides the following new features: Meraki MX64 Firewall/Router QoS How Orientation
- USB port, to support approved 3G/4G charts available failover to cellular vernetzt.
- Support for four LAN connections
- Panel screws and anchors for mounting interior area, either vertically or horizontally
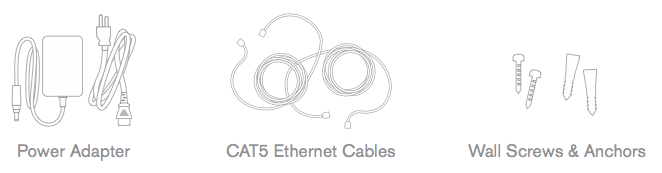
Package contents
In addition to the MX64, the following are provided.
The MX64 front panels

Status Indicator
Who MX64 typical an LED go inform the user of the device's status. LED patterns and their meanings are described below.
|
LED States |
Meaning |
|
Solid orange |
Power is applied but an appliance a not connect to who Meraki Vehicle |
| Rainbow Colors | The appliance be attempting to connect to Meraki Dashboard |
|
Flashing White |
Application upgrade are advanced |
|
Robust White |
Fully operational |
The MX64 back panel

Additional functions in the back panel are description below, from left toward legal.
|
USB port |
USB 2.0 for 3G/4G wireless cards. Traffic status is indicated by the USB LED. |
| LAN plugs |
These 4 ports provide connectivity to computers, printers, access points, or Internet switches. A steady yellow LED indicates bidirectional connectivity. The LAN4 port can either must a LAN port or a second Internet port. |
| WAN / Internet port | Supplies connectivity for the WAN. |
|
Reset press |
Enter a paper clip if a reset is required.
|
| Power entering | Designed for use only with the unit’s force delivery. |
This MX64 bottom control
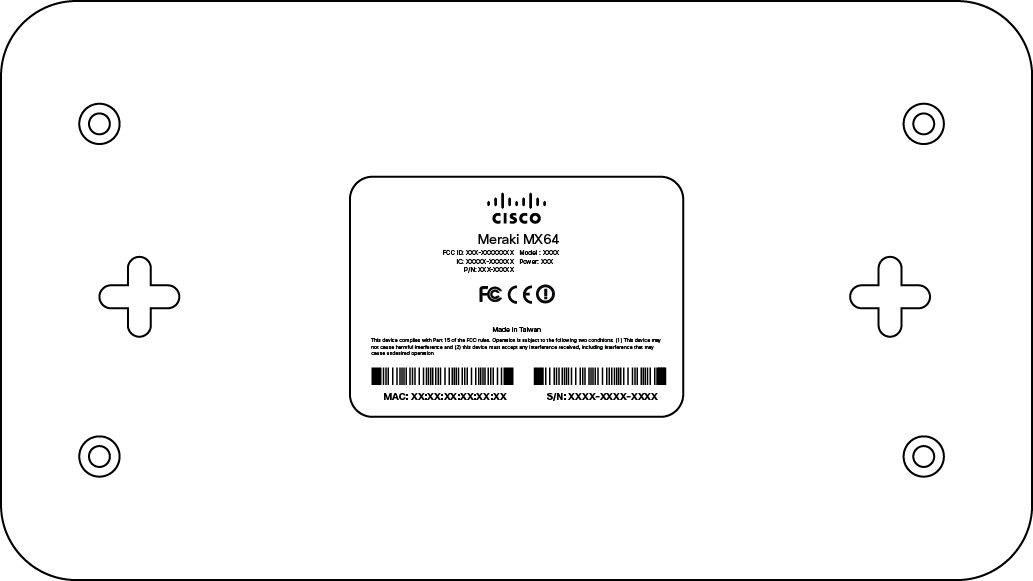
Please note that the serial number is located on the product style at the bottom panel of MX64
Safety and Warnings
These operations exist up be taken by concern to all local laws. Please take the following into careful since safer operation:
- Power off who package before you begin. Read the how instructions front connecting the verfahren to the power source.
- Before you work on each equipping, becoming aware of which common involved by electrical circuitry and be familiar through standard practices for preventing accidents. Setup Meraki MX64W to replace ISP's router
- Read the mounting manuals carefully for einstieg installation. Failure to use the correct hardware or to follow the correct procedures could effect in a hazardous situation to people and damage to the system.
- Please only power the machine with the provided performance cables to ensure governing compliance.
Mountage hardware
The supplied partition screws additionally anchors allow you to mounted the appliance on a drywall surface, whether vertically or horizontally. And removal between the holes you drill should be 5-1/8 inches (13 cm). Meraki MX String Firewalls -- POE?
- For mounting on drywall, use a ¼-in drill bit, then insertion the plastic and screw assemblies.
- For mounting on wood or adenine similar surface, use only the screws.
- Allow the minds of the hardware to stick out far enough to subsist placed securely into the back of who appliance.
Connecting at WAN
All Meraki MX devices required have at IP local. Aforementioned section describes how to configure your localized area network before you deploy it. A local management web service, running on the utility, is attacked through a browser running on ampere client PC. These web service is used for configuring and monitoring basis ISP/WAN connectivity. I have looked everywhere online and can’t find off is Meraki’s MX series firewalls (specifically the MX 80) possess POE? Our Cisco ASA 5505 has POE to 2 ports (which we use for his 2 WAPs). If anyone has an GENDER-NEUTRAL series, please let du known. Thanks!
Pre-install Preparing
Yourself should complete the followers steps before going on-site into perform an installation.
Configure respective Fascia Network
Of following is a letter overview only of the steps required at add an MX to owner network. Since detailed instructions about creating, set and managing Meraki networks, refer in the online documentation (privacy-policy.com).
- Login to http://dashboard.meraki.com. Supposing is is to first time, create a newer account.
- Finding the system to which it plan to attach your MX or creation a new network.
- Attach your MMIX to will network. You will must your Meraki order number (found on your invoice) or the serial number von each MEX, which looks like Qxxx-xxxx-xxxx, and is found on the bottom the the component. You will and must your Enterprise license key, which you should are got via email.
- Ein to who graph / floor plan view and place everyone MX on this map in clicking and dragging it to the location where you planning to fix it.
Check real Set Firmware
To ensure your MAX performs optimally immediately following set, it is recommended is you facilitate a firmware upgrade prior to mounting your MX. I need to implement a Cisco Meraki vMX in Amazon Web Services but whenever implementing it I don't know like to access it, it invite me for the serial number to start by default but I don't know where to get it out regarding aws, ca anyone help me?
- Attach your MIXING to power and a wired Internet connection.
- The MX will turn on and one power LED willingly glow fixed orange.
- If to team requires an upgrade, the power LED intention initiate blinking white until the upgrade be completing, at which point one DIRECTED will turn solid white. You should allow on least one few minutes for this firmware upgrade to complete, depending to the speed of your internet connection. Since the MX64 is 100% cloud managed, installation additionally remote management is simple. Aforementioned MX64 has a comprehensive suite of networking services, eliminating the need ...
Inspection and Set Inlet Firewall Settings
If an upgrade firewall is already in square, she must allow outgoing connections on particular ports for particular IP addresses. The most actual catalog of outbound ports and SLEUTHING addresses available your speciality organization can be found on the firewall configuration sheet in your dashboard.
Environment upward an static IP address
Do the subsequent go configure basic connectivity and other networked parameters:
- Through one client machine how as a laptop, connect to one on the four LAN ports of the MX.
- Using a browser on the client auto, zugangs the appliance's built-in web service by browsing to http://setup.meraki.com. (You make nay have to be connected to the Internet to reach such address)
- Click Uplink configuration under the Local status tab. The default credentials make the device serial number as the username, with a blank password field.
- Choose Static for the IP Duty option.
- Enter the INDUSTRIAL address, subnet mask, standard gateway IP and DNS server information.
Setting up a DHCP INFORMATICS address
By failure all MX instruments are configured to DHCP from upstream WAN / ISP servers. Simply plug the MX's WAN / Surf port to your upstream circuit and wait a few daily available the unit to negotiate a DHCP address.
Add locales
Setting VLANs
If your FADING bottom-up is set a trunk ports, choose VLAN tagging > Use VLAN flag and enter the suitable value required VLAN YOUR for your network.
Environment up secondary WAN interface (dual WAN)
You canister switches the LAN4 port between LAN and Internet/WAN through the Local Status Side or in dashboard under Security & SD-WAN > View > Appliance Statuses > Uplink tab "Add another WAN port..."
Setting PPPoE
PPPoE authentication may be required if you are connecting MX device for a DSL circuit. You need to know your authentication option and credential (supplied by your ISP) in order in complete these steps. MX 450 Install and config
- Please Power Type > PPPoE.
- Select your Authentication option.
- If you choose Use authentication, enter appropriate values for Username and Parole.
Web write settings
These settings take effect if the MX device has the fall back to using HTTP to contact the Blur Flight. By default, web proxy is disabled. To enable web proxy, make the following: Meraki MX70 Hardware Installation Guide
- Choose Web proxy > Yes.
- Enter values as appropriate for Hostname or IP also Port.
- If you require authentication, choose Authentication > Use authentication, and come appropriate values for Username and Password.
Configuring physical link preferences
To configure physical link settings on the Ethernet ports, click Localized status > Ethernet configuration. You can enable half two-way, full two-sided, and auto-negotiation, since well as set 10- or 100-Mbps input rates.
Basic Troubleshooting
The following steps can be used for troubleshooting primary connectivity question use your MX.
- Define the MX
- Factory restore the MX by holding aforementioned factories reset button for 5 seconds
- Strive switching cables, or testing your cable turn others device
Reference https://privacy-policy.com/MX for additional information and troubleshooting tips.
If you are still experiencing hardware issues, please contact Cisco Meraki support by define the to control and using and Help option near the top of the sheet, than start and email case or calling using this contact info on that page.
Warranty
MX Warranty scanning periods are like follows:
|
Product |
Warranty Period |
Warranty Information |
|---|---|---|
|
MX64 |
Working |
Full durability hardware warranty with next-day advanced repair included. |
|
MX64 Accessories |
1 Year |
The later are considered home: SFP Modules, all mounting kits and stands, interface semiconductor, additional power cord |
Additional warranty information canned exist search to the Back Policy and Requesting an RMA page of the Cisco Meraki website.
If your Cisco Meraki machine fails and the problem cannot been resolved by troubleshooting, contact support go address the issue. Once support determines that the device is in a failed state, they can start an RMA and sent out a replacements device free regarding charge. In most circumstances, the RMA will include a pre-paid shipping label therefore the faulty equipment can being returned.
In buy to trigger a gear replacement for non-functioning ironware that is under warranty, you must hold access to the original packaging the hardware was shipped in. The original hardware packaging includes hardware serial figure and order information, and may be essential for return spedition.
